Creating your own Markdown Parser from Scratch in Swift
You know Markdown, right? That text format which uses funky characters like ** or > to create well formatted
documents? Awesome! Many platforms use it on a daily basis, so you will eventually use it too.
Now, what if you need a markdown parser for your Swift application? Well, we could just use one of the well-tested ones (which can be found using your favorite search engine on GitHub), but instead… you can also create your own version.
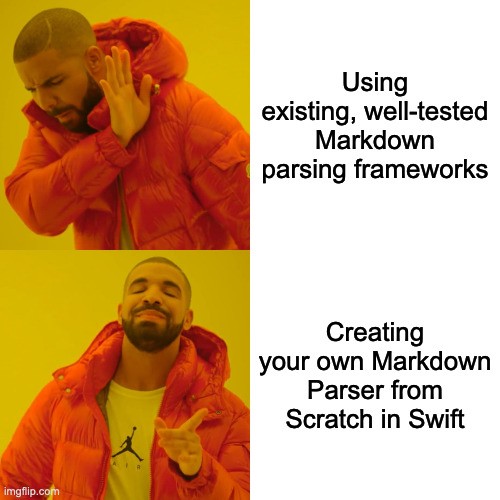
All jokes aside: if possible, do not reinvent the wheel. If an existing framework with an active maintainer fits your needs, use that one. At techprimate we decided to create our own solution, CoolDown, because an upcoming app uses Markdown with many custom extensions, therefore it was more convenient to have full control.
This article will also give you a general idea on how to parse a structured plain text document. Here a quick outline what we will cover:
- Markdown Document Structure
- Structure of a Document Parser
- Implementing the Code
- Parsing fragments by their characters
Markdown documents are written entirely in plain text, and any additional assets are only added as URL references.
Over the years multiple Markdown specs surfaced and many platforms (e.g. GitHub) adapted and extended it. Eventually it got standardized to remove ambiguity. For this tutorial, we will use the CommonMark 0.29 specification as a reference, as it is quite a common one (pun intended).
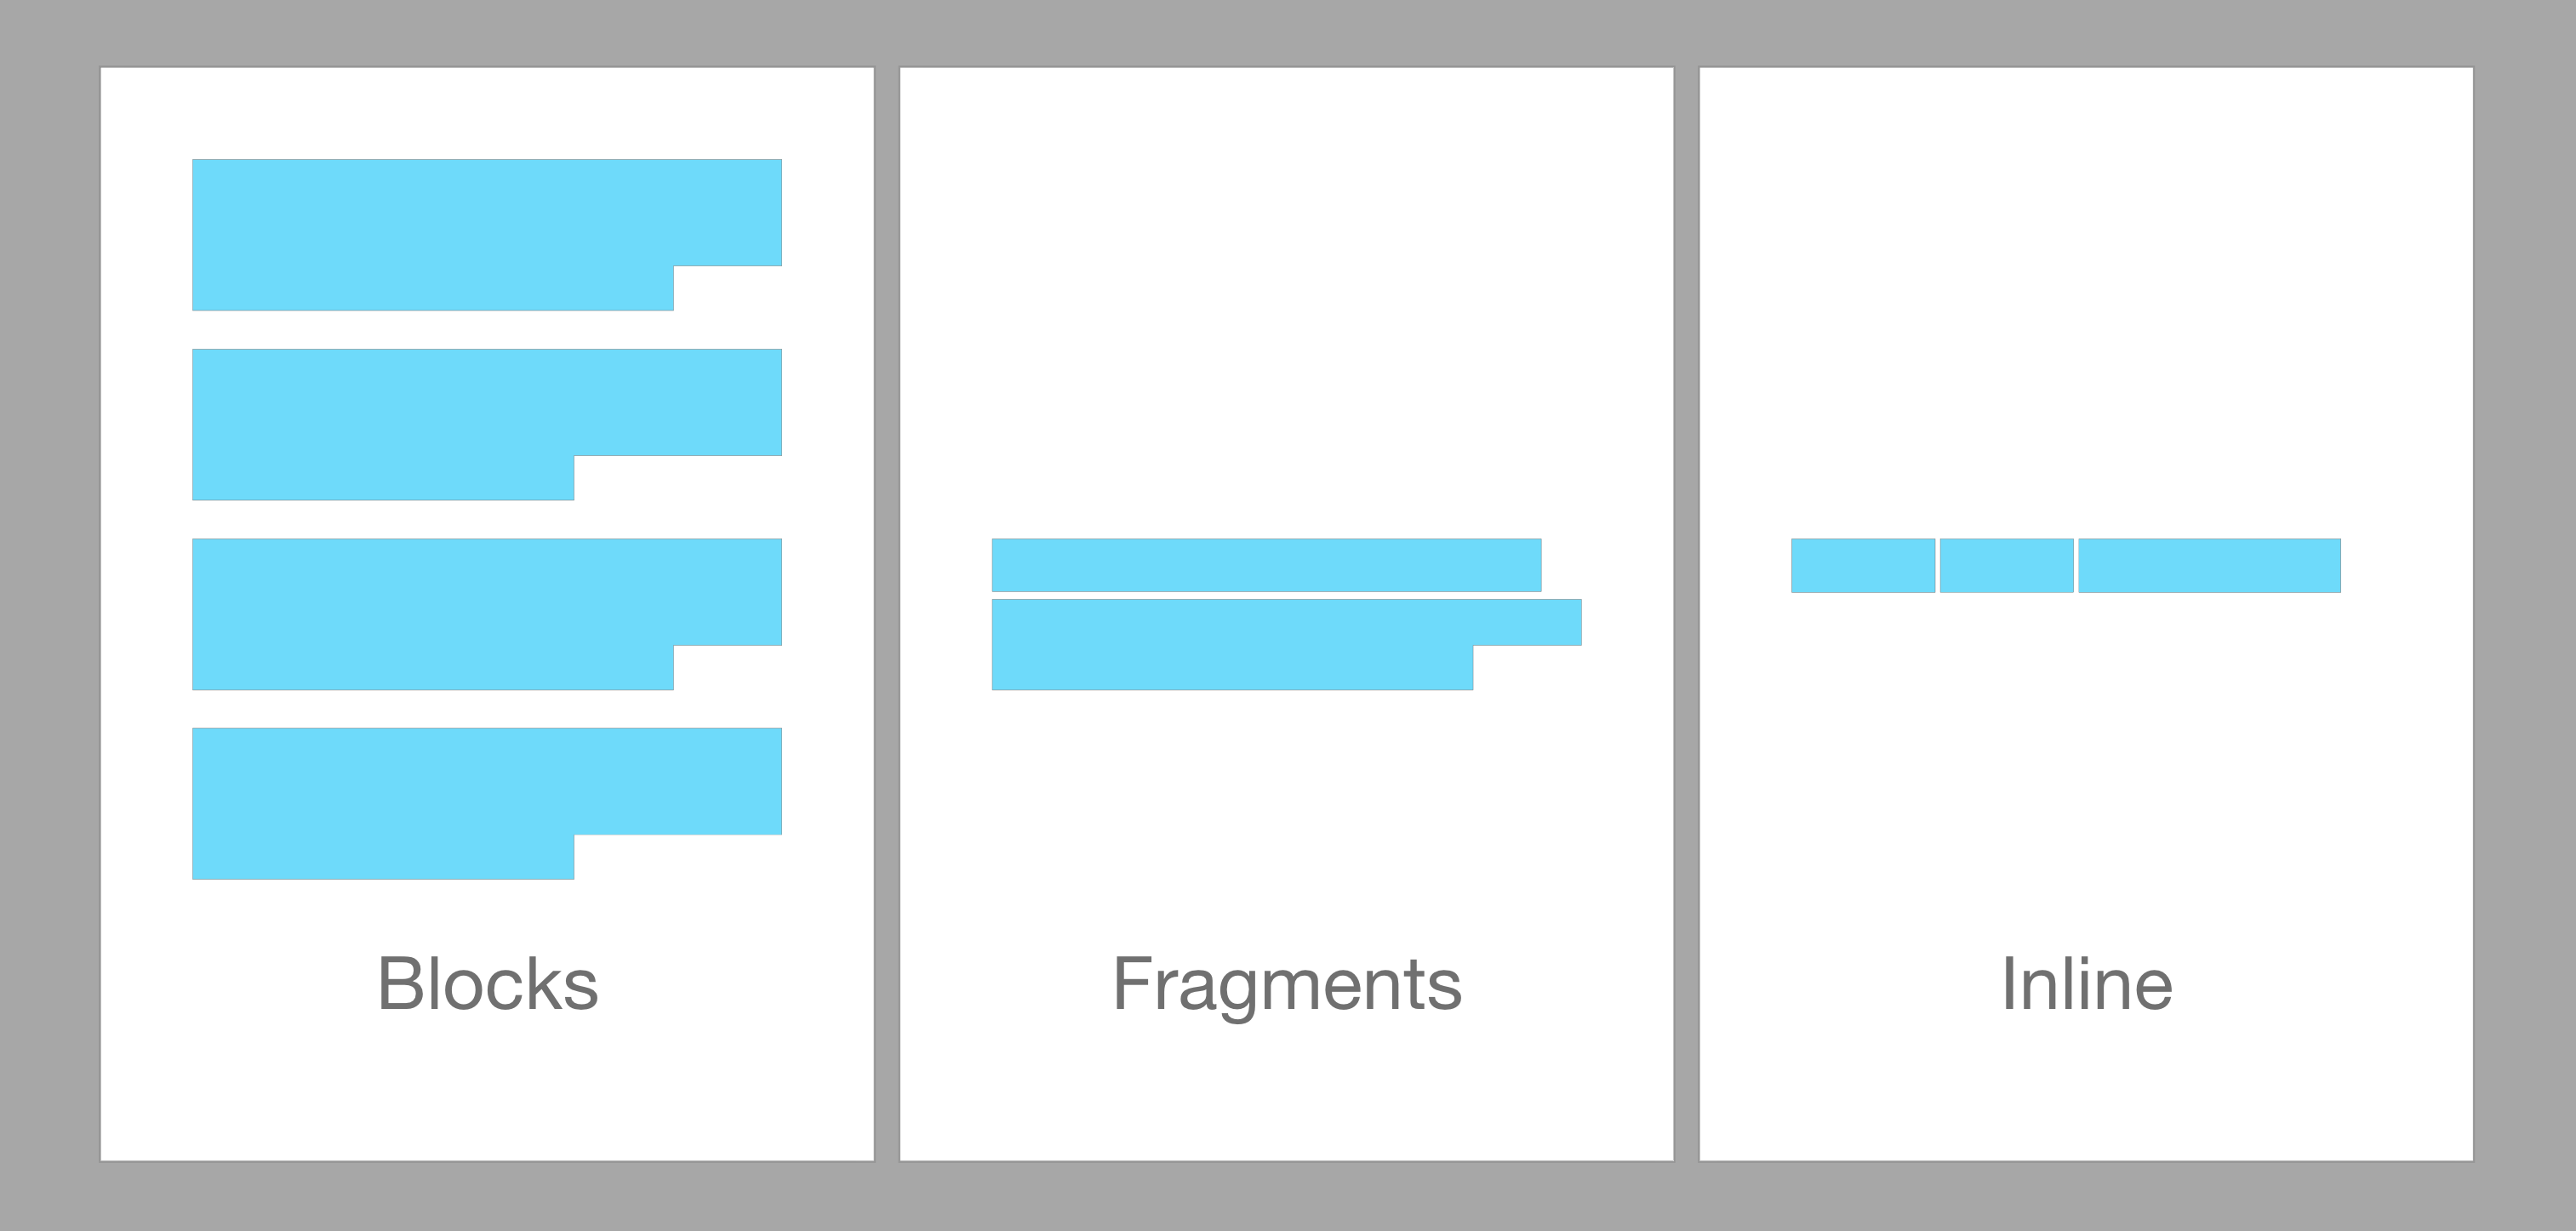
A major structural element of the document is the double-newline/empty line, as it structures our document into a sequence of blocks. Just look at the following example:
This is the first block of text.\n
\n
This is the second block of text.
It is quite obvious that these should be considered as two blocks, but the following is only a single block:
This is the first line of the block.\n
This is the second line of the block.
These blocks can be categorized even further into Leaf Blocks (e.g. headings), Container Blocks (e.g. lists) and Inlines (e.g. code spans). I won’t go further into detail for now, as you can just look at the detailed CommonMark documentation.
Now we need to take a closer look at a single block:
This is a full text *with some cursive* and some **bold text**.
This is still a single block, but it consists out of 5 inline blocks/elements:
- Plain Text:
This␣is␣a␣full␣text␣(including the trailing whitespace) - Cursive Text:
with␣some␣cursive - Plain Text:
␣and␣some␣ - Bold Text:
bold␣text - Plain Text:
.
Alright, at this point you have some basic understanding of what data we are dealing with. Now you need to know how to parse a plain text document in general. A rule of thumb:
Break the text it into the smallest possible chunks, before processing each chunk
As mentioned before, our document consists out of a sequence of blocks. This already makes our lives way easier, as we can now analyze the blocks individually.
Next we know that none of the Markdown elements span more than a single line. Even the following example, a multi-line code segment, can be seen as three “sub-blocks”. To simplify our naming, I will from now on refer to them as Fragments:
```                           <-- opening fragment
print("Hello World!")         <-- code fragment
```                           <-- closing fragment
We already broke down a large document into blocks and afterwards into fragments. As the content of the individual fragments varies, we can not break it down any further.
By keeping this structure in mind we can create the following basic algorithm:
1. Split the document into blocks
2. Iterate all blocks
    2.1 Split each block into fragments
    2.2. Iterate all fragments
        2.2.1 Parse the fragment them into nodes (e.g. bold text)
    2.3 Merge related parsed nodes together (e.g. code block)
3. Merge the nodes even further into a document tree, representing the original document
Your time has come. It’s time to write some code 🔥
As our library is entirely logic based and works as a black box (text as input, parsed document as output) this is a great use-case for Test-Driven-Development (TDD). The main idea of this development strategy is first defining a test case, which will fail on purpose, and then writing the code to fix it.
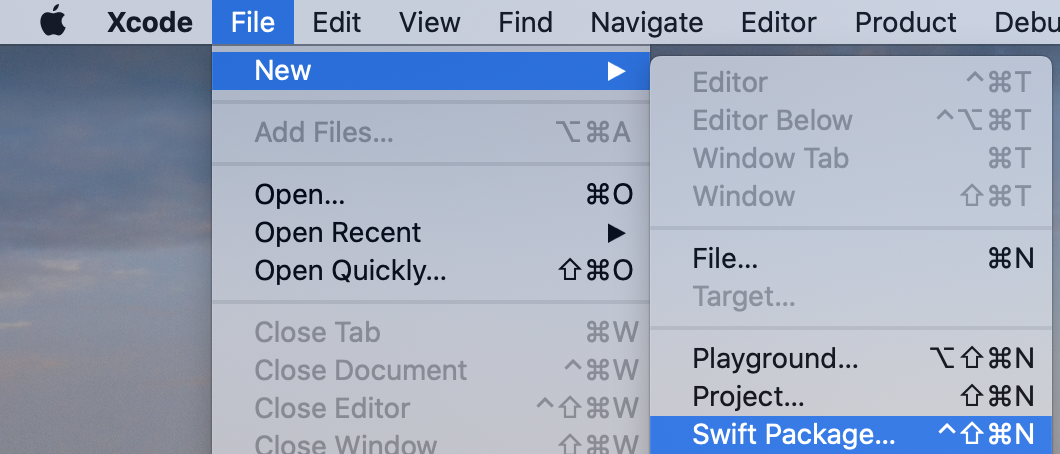
As the first step create a new Swift package MarkdownParser using either your Terminal of choice and swift package init –type library or using Xcode:
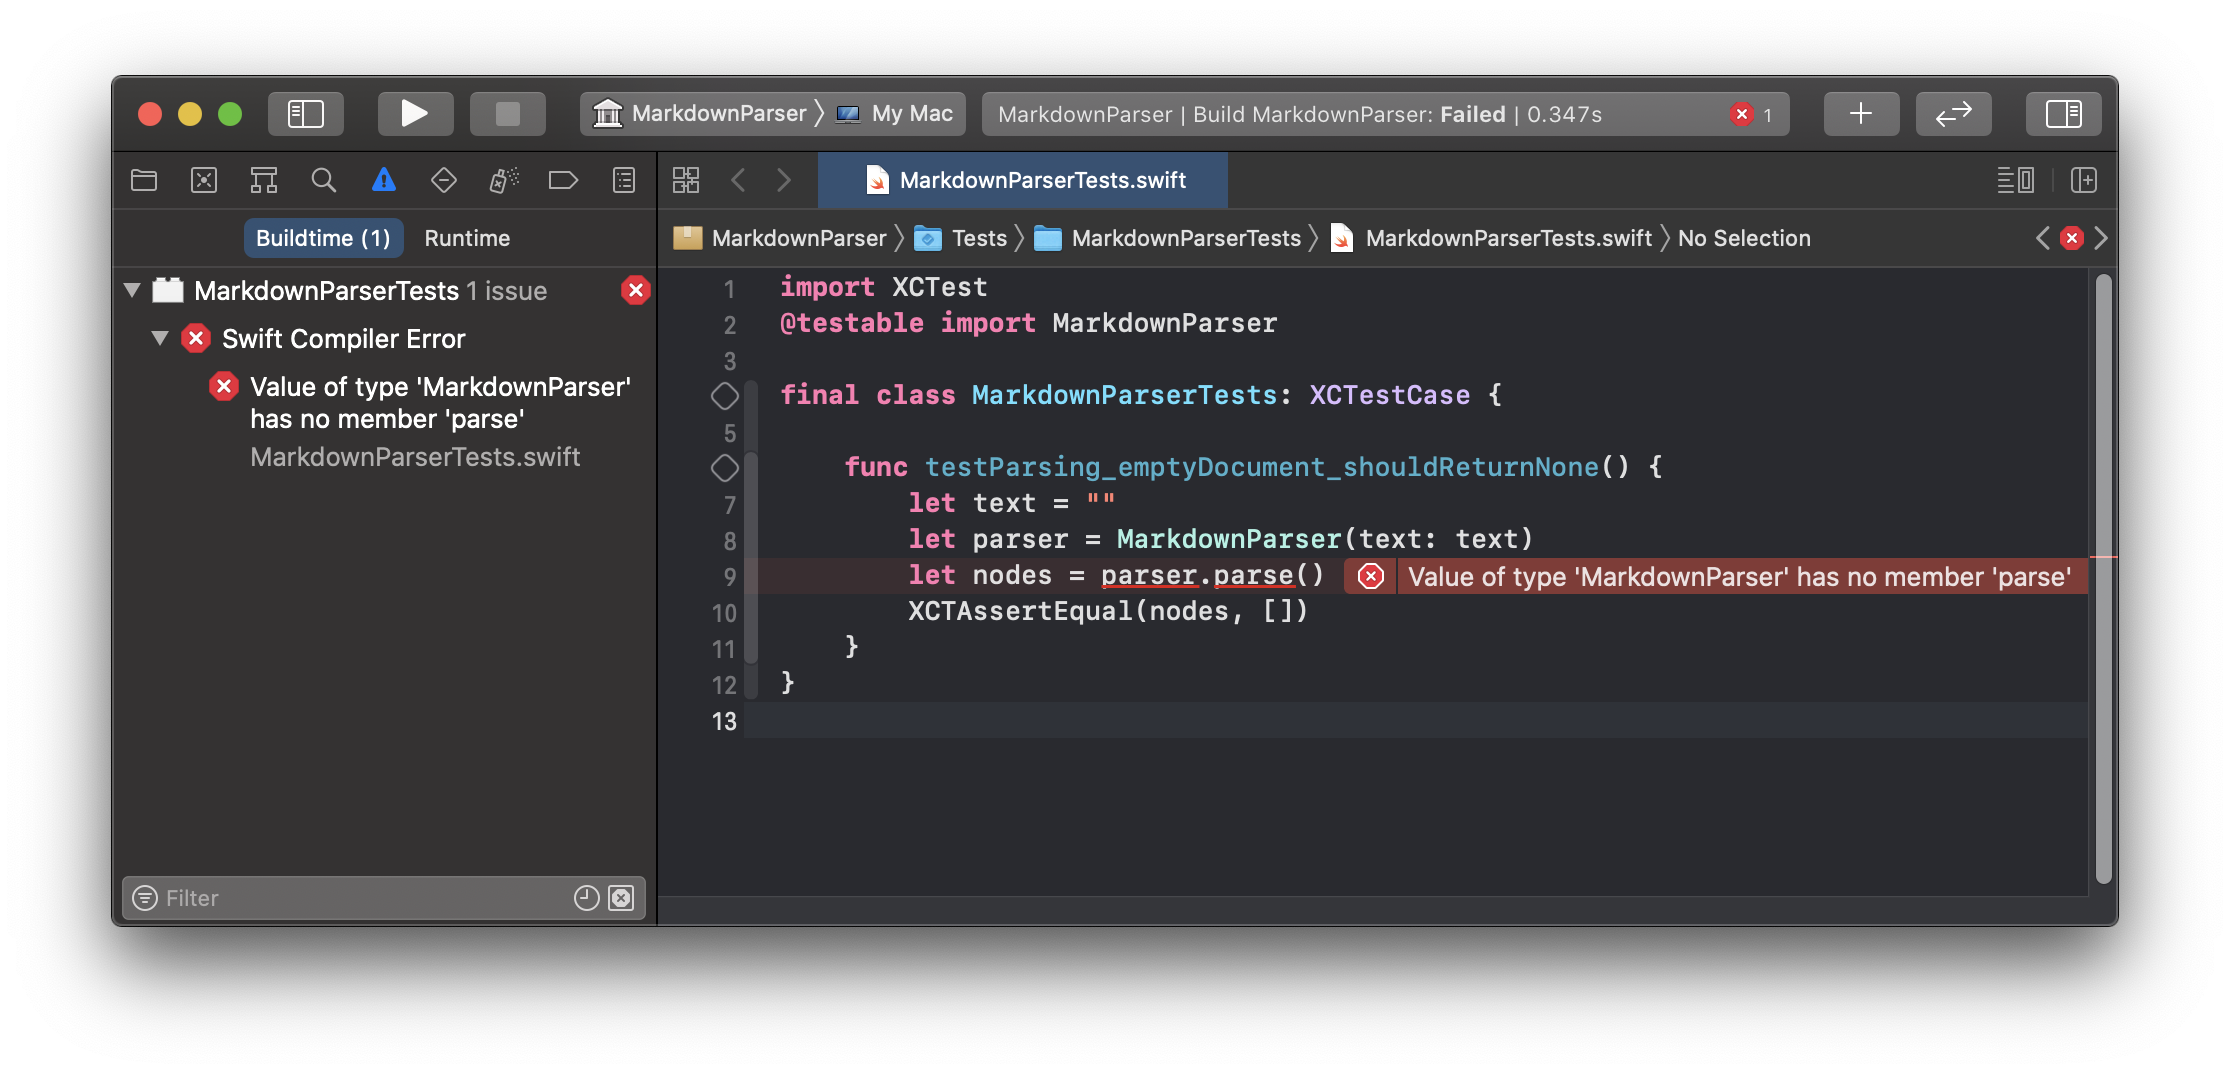
Next, open up MarkdownParserTests.swift and create your first test case:
final class MarkdownParserTests: XCTestCase {

    func testParsing_emptyDocument_shouldReturnNone() {
        let text = ""
        let parser = MarkdownParser(text: text)
        let nodes = parser.parse()
        XCTAssertEqual(nodes, [])
    }
}
This code is straight forward, but for the sake of the tutorial I will explain it: First define the input text, then create a parser using the input text and call parse() to convert it into a node tree. Finally we write a test assertion to check that it returns the expected result.
Xcode will usually tell you about the syntax issues rather quickly:
The only solution to fix this situation is implementing the class MarkdownParser which fulfills the test expectations:
class MarkdownParser {

    private let text: String

    init(text: String) {
        self.text = text
    }

    func parse() -> [MarkdownNode] {
        return []
    }
}

enum MarkdownNode: Equatable {}
Run the test again and it will not fail anymore (for now foreshadowing intensifies) 🎉
Before adding more functionality, add a new test case:
func testParsing_singleLineOfText_shouldReturnSingleTextNode() {
    let text = "Hello World"
    let parser = MarkdownParser(text: text)
    let nodes = parser.parse()
    XCTAssertEqual(nodes, [
        .text(content: "Hello World")
    ])
}
Once again we need to fix our code to fulfill the expectations by adding a new content node type to our known node types
enum MarkdownNode: Equatable {
    case text(content: String)
}
and changing our parser to satisfy both test cases:
class MarkdownParser {

    private let text: String

    init(text: String) {
        self.text = text
    }

    func parse() -> [MarkdownNode] {
        // In case the text is empty, return an empty sequence instead of any nodes
        if text.isEmpty {
            return []
        }
        return [
            .text(content: text)
        ]
    }
}
Note: In this tutorial I am using an enum to define the different nodes, because of it’s simplicity. You can also create struct’s or even classes to return the parsed nodes.
Alright, alright, alright… enough with the simple text parsing. By now you hopefully understand how TDD is working, so let’s jump a few steps forward and create a more advanced test case:
func testParsing_multipleTextBlocksWithNestedBold_shouldReturnMultipleParagraphs() {
    let text = """
    This is a text block **with some bold text**.
    Another paragraph with more **BOLD** text.
    """
    let parser = MarkdownParser(text: text)
    let nodes = parser.parse()
    XCTAssertEqual(nodes, [
        .paragraph(nodes: [
            .text("This is a text block "),
            .bold("with some bold text"),
            .text(".")
        ]),
        .paragraph(nodes: [
            .text("Another paragraph with more "),
            .bold("BOLD"),
            .text(" text."),
        ])
    ])
}
The first step to deal with this complex example is creating the necessary node types:
enum MarkdownNode: Equatable {

    case paragraph(nodes: [MarkdownNode])

    case text(String)
    case bold(String)

}
Now remember the algorithm in the introduction: First we need to split the text into blocks to then iterate them. We do this in a testable way by creating a so called Lexer , a class to split our raw content into smaller chunks (the so called lexems). Additionally it implements the iterator protocol, to use a standardized looping mechanism:
import Foundation

/// A Lexer is used to iterate the so/called lexems, tokens in a string, basically an iterator.
class Lexer: IteratorProtocol {

    /// Lexems to iterate
    private let lexems: [String]

    /// Current iterator position
    private var index = 0

    /// Creates a new Lexer by tokenizing the given expression string.
    ///
    /// If the given expression is empty, or contains only empty characters (such as spaces),
    /// `nil` is returned, indicating no further parsing is necessary
    ///
    /// - Parameter expression: Expression used to tokenize and lex
    convenience init?(raw expression: String, separator: String) {
        let lexems = expression.components(separatedBy: separator)
        guard !lexems.isEmpty else {
            return nil
        }
        self.init(lexems: lexems)
    }

    /// Creates a new Lexer for iterating the given lexems.
    /// - Parameter lexems: Tokens to iterate
    init(lexems: [String]) {
        assert(!lexems.isEmpty, "Lexer should have at least one value")
        self.lexems = lexems
    }

    /// Returns the currently selected lexem, does not modify the cursor position.
    var token: String {
        lexems[index]
    }

    /// Returns the currently selected lexem and moves the cursor to the nex position.
    func next() -> String? {
        guard !isAtEnd else {
            return nil
        }
        let token = lexems[index]
        index += 1
        return token
    }

    /// Returns truthy value if the end is reached, therefore all elements were iterated.
    var isAtEnd: Bool {
        index >= lexems.count
    }
}
Our Markdown parser is growing and the first two steps of our algorithm are already implemented:
import Foundation

class MarkdownParser {

    private let text: String

    init(text: String) {
        self.text = text
    }

    func parse() -> [MarkdownNode] {
        guard !text.isEmpty, let lexer = Lexer(raw: text, separator: "\n\n") else {
            return []
        }
        var result: [MarkdownNode] = [
            // Leave this node here for now, so our original test cases are not failing
            .text(text)
        ]
        // Iterate the lexems/blocks until there are no more available
        while let block = lexer.next() {
            // TODO: parse the block
        }
        return result
    }
}
Good job with the progress! Let’s take care of step 3 and 4 next:
3. Split each block into fragments
4. Iterate all fragments and parse them into nodes (e.g. bold text)
Create another class BlockParser which will iterate every fragment in a block and parse them individually:
class BlockParser {

    let text: String

    init(text: String) {
        self.text = text
    }

    func parse() -> [MarkdownNode] {
        guard let lexer = Lexer(raw: text, separator: "\n") else {
            return []
        }
        var result: [MarkdownNode] = []
        while let fragment = lexer.next() {
            // Leave this node here for now, so our original test cases are not failing
            result += [
                .text(text)
            ]
        }
        return result
    }
}
Adapt the MarkdownParser.parse() to use it for each block and finish step 3 of our algorithm:
...
var result: [MarkdownNode] = []
// Iterate the lexems/blocks until there are no more available
while let block = lexer.next() {
    result += BlockParser(text: block).parse()
}
return result
...
Up until this point the structure of the document was well-known (blocks split by empty lines, fragments split by newline characters).
For the actual fragment parsing logic you can choose from multiple approaches (such as using Regex’s) but in this approach we are using a character-based lexer.
The fragment lexer differs from the previous ones, as it iterates the content by each character and also offers additional methods to peek at further characters (does not increase the iterator counter) and rewind to move the iterator backwards.
class FragmentLexer: IteratorProtocol {

    let content: Substring
    var offset: Int = 0

    init(content: Substring) {
        self.content = content
    }

    var currentCharacter: Character? {
        guard offset >= 0 && offset < content.count else {
            return nil
        }
        return content[content.index(content.startIndex, offsetBy: offset)]
    }

    func peekPrevious(count: Int = 1) -> Character? {
        offset -= count
        let character = currentCharacter
        offset += count
        return character
    }

    func next() -> Character? {
        let character = self.currentCharacter
        offset += 1
        return character
    }

    func peekNext() -> Character? {
        let character = next()
        rewindCharacter()
        return character
    }

    func rewindCharacter() {
        assert(offset > 0, "Do not rewind below zero!")
        offset -= 1
    }

    func rewindCharacters(count: Int) {
        offset -= count
    }
}
Using all the knowledge we gathered during this tutorial, let’s create the last missing parser, the FragmentParser.
This class is going to use our FragmentLexer and identify the different nodes by specific characters, as declared in the
specification. In the first version, we concatenate each character into a .text(...) node to fulfill our second test
case:
class FragmentParser {

    let fragment: String

    init(fragment: String) {
        self.fragment = fragment
    }

    func parse() -> [MarkdownNode] {
        var result: [MarkdownNode] = []
        // Leave this node here for now, so our original test cases are not failing
        let lexer = FragmentLexer(content: fragment)

        while let character = lexer.next() {
            if let lastNode = result.last, case MarkdownNode.text(let previousText) = lastNode {
                result[result.count - 1] = .text(previousText + String(character))
            } else {
                result.append(.text(String(character)))
            }
        }
        return result
    }
}
This works fine for the simple use case, but for more complex use-cases we need an additional data structure to efficiently track the abstract nesting position inside the fragment.
To understand what is going on, we think through the parsing logic of a more complex block (even more complicated than the previous ones):
This is a text block **with bold _and cursive_** text.
Should map the following structure:
.paragraph(nodes: [
    .text("This is a text block"),
    .bold("with bold"),
    .boldCursive("and cursive"),
    .text(" text.")
]),
Our fragment parsing algorithm will therefore work something like this:
1. character = "T", result = []
  --> add text node to result with content "T"
2. character = "h", result = [.text("T")]
  --> append the character to the previous node
...
22. character = "*", result = [.text("This is a text block ")]
  --> check if the next character is also a  "*", if yes begin a bold text and skip the next one, otherwise begin a cursive text
23. character = "*" --> skipped
24. character = "w", result = [.text("This is a text block "), .bold("")]
25. character = "i", result = [.text("This is a text block "), .bold("w")]
...
34. character = "*", result = [.text("This is a text block "), .bold("with bold ")]
  --> same check as above
35. character = "a", result = [.text("This is a text block "), .bold("with bold "), .boldCursive("")]
...
47. character = '*", result = [.text("This is a text block "), .bold("with bold "), .boldCursive("and cursive")]
  --> exit boldCursive mode, and return to bold only mode
...
Please keep in mind, this is pseudo code and should only help to understand what is going on.
Now look at the following slightly different example:
This is a text block **with bold \*and none cursive** text.
After removing the last asterisk, the parsed structure will look a bit different:
.paragraph(nodes: [
    .text("This is a text block"),
    .bold("with bold *and none cursive"),
    .text(" text.")
]),
Unfortunately this also depends on our parser, as the following output could be valid too:
.paragraph(nodes: [
    .text("This is a text block *"),
    .cursive("with bold "),
    .text("and none cursive"),
    .cursive(""),
    .text(" text."),
]),
This is a software design decision you have to make. In case you are curious how I implemented it, checkout the BoldCursiveInlineSpec.swift of CoolDown on GitHub.
As an efficient way of tracking the nesting, I decided to use a stack, which adds an additional node on the beginning
characters (such as **) and removes it from the stack when the closing characters are found.
To not increase the complexity of this tutorial any further, I will not cover the exact implementation of the stack mechanism. If you want to know now more, CoolDown is very well commented.
Alright, this is the final FragmentParser for the scope of this tutorial:
class FragmentParser {

    let fragment: String

    init(fragment: String) {
        self.fragment = fragment
    }

    func parse() -> [MarkdownNode] {
        var result: [MarkdownNode] = []
        let lexer = FragmentLexer(content: fragment)

        // Start iterating every character
        while let character = lexer.next() {
            // Check if the character is an asterisk
            if character == "*" && lexer.peekNext() == "*" {
                // Move the cursor once forward to skip the second asterisk
                _ = lexer.next()
                // Array to track the characters inside the bold inline segment
                var characters = [Character]()
                // Flag to check if we ran out of characters before closing the inline segment
                var hasTerminated = false
                // Character counter, in case case we need to rewind
                var rewindCount = 2
                // Iterate remaining characters until the bold segment finishes or the block runs out of charactesr
                while let nestedChar = lexer.next() {
                    rewindCount += 1
                    if nestedChar == "*" && lexer.peekNext() == "*" {
                        // skip second asteriks
                        _ = lexer.next()
                        // exit the loop, as the bold segment is done
                        hasTerminated = true
                        break
                    } else {
                        characters.append(nestedChar)
                    }
                }
                // If the inline element didn't terminate correctly, it shall not be detected
                if hasTerminated {
                    // we successfully parsed the bold block but only append it if it is not empty
                    if !characters.isEmpty {
                        result.append(.bold(String(characters)))
                    }
                    continue
                } else {
                    // Rewind to beginning of fragment and parse it as non-bold
                    lexer.rewindCharacters(count: rewindCount)
                }
            }
            // If there is an existing text node, append the character, otherwise create a new one
            if let lastNode = result.last, case MarkdownNode.text(let previousText) = lastNode {
                result[result.count - 1] = .text(previousText + String(character))
            } else {
                result.append(.text(String(character)))
            }
        }
        return result
    }
}
The code is commented so it should be self-explanatory. In this example you can also see why our FragmentLexer has additional peek and rewind methods.
When you run the test case once again, they still fails with the following result:
// we get this
[
    .text("This is a text block "),
    .bold("with some bold text"),
    .text("."),
    .text("Another paragraph with more "),
    .bold("BOLD"),
    .text(" text."),
]

// instead of this:
[
    .paragraph(nodes: [
        .text("This is a text block "),
        .bold("with some bold text"),
        .text(".")
    ]),
    .paragraph(nodes: [
        .text("Another paragraph with more "),
        .bold("BOLD"),
        .text(" text."),
    ])
]
If you are fine with the two blocks being merged into a single one, good job, change the tests and you are done 😄
If not, change the MarkdownParser.parse() method to group the nodes per block and if more than one block was found, it
shall wrap them in paragraph nodes:
func parse() -> [MarkdownNode] {
    // Split text by empty lines
    guard !text.isEmpty, let lexer = Lexer(raw: text, separator: "\n\n") else {
        return []
    }
    var nodesPerBlock: [[MarkdownNode]] = []
    // Iterate the lexems/blocks until there are no more available
    while let block = lexer.next() {
        nodesPerBlock.append(BlockParser(text: block).parse())
    }
    if nodesPerBlock.count == 1 {
        return nodesPerBlock[0]
    }
    // We want to group nodes per block so we can identify them afterwards
    return nodesPerBlock.map { .paragraph(nodes: $0) }
}
You made it! Congratulations 🥳
This tutorial only covered a small subset of the possibilities in using and parsing Markdown. Obviously the three tests are not enough to covert the implemented functionality, so make sure to write more tests!
I also referenced our custom parser @ techprimate called CoolDown multiple times, which is still a work-in-progress, but is eventually getting production ready. We decided to build it as an Open Source Swift package, so checkout the GitHub repository.
Next to actually writing a small working parser, you also got more insight into the document format itself. Now you should be able to pick it up from there and continue working on the parser.
If you enjoyed this article, you might also find these helpful:
- Building SwiftUI apps in Markdown - Learn how to use your Markdown parser to create SwiftUI views dynamically
- 5 Swift Extensions to write Smarter Code - Improve your Swift code quality with these essential extensions
- Modularize Xcode Projects using local Swift Packages - Learn about Swift Package Manager for better code organization
If you would like to know more, checkout my other articles, follow me on Twitter and feel free to drop me a DM. You have a specific topic you want me to cover? Let me know! 😃
Related Articles